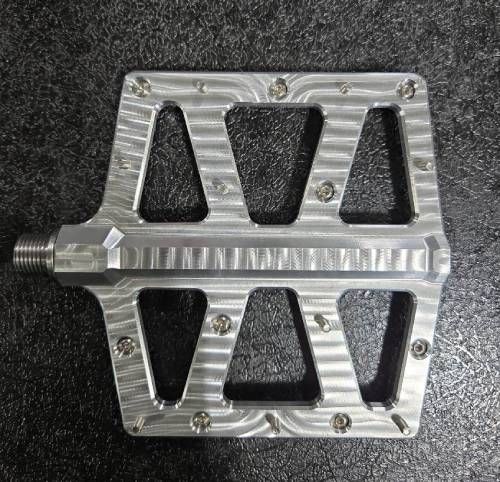
How to Setup Your Bike Pedals
Share
Congratulations on the purchase of your new Moongate Cycles bike pedals! We are happy to have you as a valued customer!!
This article will help you get started with your new bike pedals. The main topic we will cover here is how to setup the pins for your bike pedals to achieve either a concave, convex, or truly flat pedal fit. Every bike rider is different, so that's why we give you a large amount of flexibility in your bike pedal setup.
Note:
If you are sure on the fit you want for your pedals, it is a good idea to use a threadlocker like Loctite 242 on your bike pedal pins. This helps to ensure your bike pedal pins do not back out during riding and get lost.
If you are not sure on the fit you will like best, it may be best to experiment on each of the below options to see what feels best for you. Once you have your optimal fit picked out, then go back and apply Loctite 242 to lock in your favorite bike pedal fit!
How to Setup Bike Pedals for Concave Fit
A majority of bicycle riders will prefer a concave fit to their bicycle pedals. This means that the pedal will be shaped like a cereal bowl to "grab" your foot as you engage the bottom of your shoe to the pedal. Most people find that this feels the most natural or comfortable for them. This type of bike pedal setup also provides the most grip as your foot is captured, in a sense, from slipping out of the "bowl."
To setup your new bike pedals with a concave fit, we will need to install:
- 4ea large pins in the four corners,
- 3ea medium pins in the front middle and the middle-bottom sides,
- 2ea small pins in the center area.
- Verify there are 9 total pins per side per the picture below!
- Flip the pedal over and repeat setups #1-#3 for the other side.
Check the below picture for your cheat sheet (L=large, M=medium, S=small):

How to Setup Bike Pedals for Flat Fit
The next most popular fit of bike pedals (after concave) is a truly flat pedal fit. This can offer a bit more relaxed feeling for some riders and a feeling that you can more easily get your feet out of the pedals if need be. This style of fit provides less grip than the concave style, but this flat fit is the easiest style to setup.
To setup your new bike pedals with a flat fit, we will need to install:
- 9ea medium pins everywhere!
- Verify there are 9ea total pins per side per the picture below!
- Flip the pedal over and repeat step #1 for the other side.
Check the below picture for your cheat sheet (M=medium):

How to Setup Bike Pedals for Convex Fit
Some truly eccentric bicyclers will prefer the convex fit of pedals. This is a pedal profile which is shaped like a "hill" of sorts. The thickest part of the pedal is in the center of the pedal, and the edges of the pedal are the thinnest.
This type of convex bike pedal can be setup by inverting the concave style setup. To setup your new bike pedals with a convex fit, we will need to install:
- 4ea small pins in the four corners,
- 3ea medium pins in the front middle and the middle-bottom sides,
- 2ea large pins in the center area.
- Verify there are 9 total pins per side per the picture below!
- Flip the pedal over and repeat setups #1-#3 for the other side.
Check the below picture for your cheat sheet (L=large, M=medium, S=small):

Other Bike Pedal Setup Tips and Techniques
Now that you have your pedals setup to your preferred pedal fit type, there are a couple more things to review.
- Once you have your favorite bike pedal fit determined, it is a good idea to install a threadlocker like Loctite 242 on all of the pins to ensure they do not back out. This is not required, but is a good practice.
- Go back through ALL of the pins you installed in your pedals and ensure they are all snug! You don't want to be losing pins along the road or trail.
- Check the end caps on your pedals and ensure these are snug. If the end caps are too lose, the pedal could fall off your bike. If the end caps are too tight, the pedal will not rotate freely due to excessive friction at the o-rings.
- As you go to install your new pedals on your bike, look for the "R" to designate the RIGHT pedal and the "L" to designate the LEFT pedal. Ensure you try to install the correct pedal on the correct side of the bike!
Final Thoughts
This article on how to setup your bike pedals walks you through the three main type of bike pedal fits (concave, flat, and convex). If none of these bike pedal fit styles feel correct to you, go out on your own and experiment to invent your own bike pedal pin setup! At Moongate Cycles, we give you MANY extra pins so that you can experiment as much as you like, dial in the perfect bike pedal fit for you, and enjoy your bike pedals to the fullest extent!
If you ever find yourself needing more bike pedal pins for your adventures, please contact us, and we will help you get the correct pins that you need.


